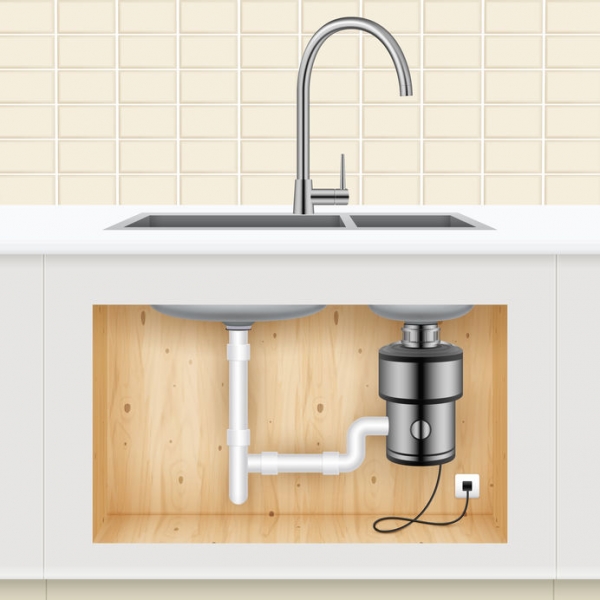
We’ve covered the do’s and don’ts of your garbage disposal, but let’s talk about how you can change out your garbage disposal. No amount of taking care of your garbage disposal can prolong the life of it, and changing out your garbage disposal isn’t as daunting as it may seem. Affordable Service Plumbing, Heating, A/C, and Electric gathered step-by-step instructions from our technicians so that you can do it safely and correctly the first time you do it. Remember, if changing out your garbage disposal is something you don’t want to do, that is why we exist! Call Affordable Service today and one of our technicians will gladly help you.
OK- your garbage disposal has gone out, you’ve gone to your local hardware store and talked to a sales associate and have the correct model in hand. All you have to do now is make space under your sink, gather your tools– so, let’s get started!
Turn Off The Power: Make sure you’ve turned the power off from the breaker. Check it once you’ve turned the power off by testing it with your live wire tool.
Pull The Tubes: Pull the waste tube to disconnect it. Note that you may need to disconnect the entire “P” trap for this step. Make note of the orientation of the pipes– take pictures if you need to remember how to reassemble. Some older model kitchens also have the dishwasher tube attached to the disposal, this needs to be taken off as well.
Locate Mounting Ring: This is located at the top of the garbage disposal: grasp the grips and turn it counter-clockwise. You should be able to loosen this with a small screwdriver. Once this is loosened, the garbage disposal will come free- be prepared because these can weigh upwards of 15 pounds.
Faceplate: Unscrew the metal faceplate from the bottom of the disposal.
Wire Disconnection: If you’re not comfortable with this step, contact Affordable Service right away. You can’t be too careful with electricity. It’s time to disconnect the power from the old unit- you may need your screwdriver and needle nose plier for this. Slip the copper ground wire out from underneath the green screw that is holding it in place, and then you can unclip the two additional wires. You can now safely set your old disposal off to the side. Make note of the colors of the wire. Black or red is “hot”; white is the “common” wire; green or bare wire is the “ground”. Take pictures with your cell phone if you don’t think you’ll remember the orientation of the wires.
Reuse Some Of The Parts: Remove the rubber snap ring from inside the old mounting bracket, as well as the old mounting bracket.
Sink Flange: Remove the sink flange by using a hammer to gently tap it from beneath and pull it up from above.
Clean-Up: You are almost ready to install the new one! Take the time to clean any of the old putty and buildup before we begin the installation process next.
Time to Install:
Putty The Flange: Apply your plumbers putty to the underside of your metal flange and reinsert it into the hole in your sink. Our Affordable Service Technicians recommend that you place something heavy on the top of the phalange to help set it securely as it dries.
Mounting Bracket: Slide the rubber gasket from your new disposal onto the new mounting bracket and then screw the new bracket into the sink. Now you can attach the new mounting ring to the mounting bracket. Depending on the model you have, this mounting ring will either slide on or need to be screwed on.
Hooking Up Power: Unscrew the metal faceplate from the bottom of your new disposal. Plug in the cord from your home to the new unit by matching the color-coded wires to the color code on the adapter. You need to wrap the ground wire back around the green screw so that it is grounded correctly.
Dishwasher Hookup: Look closely at the disposer connection to the dishwasher! Likely, there is a plastic or metal plug that you will need to remove. Remove this plug or you can damage your dishwasher or have a huge mess to clean up. Hook the connection back up to the new garbage disposal.
Mounting: Lift the new unit into the mounting ring and turn the disposal so the unit is secure.
Final Tube: Reconnect the discharge tube to your new garbage disposal.
The Test: Remove the weight in the sink and after you have made sure that everything is secure, clean up the remaining plumbers putty, turn your water on and check under the sink to confirm that no water is leaking.
Power: You can now safely turn the power on and clean up.
You did it! If these steps are intimidating, we would love to help you. Our technicians can be in and out and it will be installed correctly. You can call Affordable Service Plumbing, Heating, Air Conditioning, and Electric or you can request an appointment online.
